One way to help keep my decorating budget low is to do some DIY. Today I am sharing my painted pumpkins. This isn't an original idea, but it is cheap and easy. It also adds a little sparkle to plain orange pumpkins.
First, the pumpkins. My mom and I visited Gust Brothers Pumpkin Farm on Saturday and they had so many pumpkins. It was a lot of fun to walk about and pick out what we wanted. It would be so easy to go pumpkin crazy.
While my purchased pumpkins were sitting on the porch, a critter munched on them. I have a few neighborhood cats that wander about and I suspect one of them had a little snack sometime during the night.
Picking colors to paint my pumpkins was actually a little more difficult than I thought. I wanted colors that would stand out against the orange, but still needed to have an autumnal quality to them.
The colors I chose were rust, pearl and gold glitter. I love all things glitter! I really liked the color combination and how they looked against the orange.
I used my handy dandy round sponge brushes to make my little circles. I just punched them on the pumpkins.
The round brushes made it so easy to make quick dots, which is the look I wanted. There was no rhyme or reason to the design.
I was happy with the rust and white colors, but the gold did a weird bubbly thing. I am not sure why, but it still looks okay. These pumpkins were not going to be in any museum as works of art.
The finished product! I am happy with how they turned out. This project took all of about 15 minutes from start to finish. Also, the mess was kept to a complete minimum. Tomorrow I will share where I am using my jazzed-up pumpkins.
Showing posts with label projects. Show all posts
Thursday, October 2, 2014
Wednesday, August 20, 2014
9 Steps to Making a Beautiful Ribbon Topiary
My cousin's daughter turned one on Saturday. It was a very special day because Abbi had been hoped and prayed for. She became a part of our family through adoption. Also, Abbi's finalization was earlier in August, so she was legally a part of our family. She is a happy girl and such a sweetheart.
To go along with her ladybug theme party, I volunteered to make ribbon topiaries. This was my first experience making them so I am sharing a few hints in your topiary-making endeavors.
1. Pick out really cute ribbon. I used 4 different patterns of ribbon. I don't think I would use a slew of different patterns and colors. You want to be able to see the different ribbon, but also have it look cohesive. I cut the pieces in 3-inch strips.
2. Get your glue gun ready! I mistakenly got foam discs for the base, so I glued them together. I also glued the dowel rod into the base, as well as the head. Glue everything together first before adding the ribbon. Since I was traveling with these, my glue gun became a live saver when one topiary became a little lopsided.
3. Choose a neutral paint color for the dowel rod. The ladybug theme was red, black and white, so it was pretty easy to choose black for the rod.
4. It all starts with one. Choose your starting spot. I decided to start at the bottom and put one of each color at the base. Then I worked my way up.
5. Here comes the pinning. I made a ribbon Halloween wreath last year and I hot glued all the ribbon. This time, I used straight pins. It was much less messy and saved my fingers from being burned.
6. Be patient. This is a project that takes a little bit of time. Put in a good movie and keep working.
7. Marvel at your beautiful ribbon-filled topiary. Because it looks awesome and you created it!
8. Finish it up. I used a little metal bucket from Hobby Lobby as the base for the topiary. I have seen some with flower pots that are really cute too, but I was lazy and didn't want to spray paint one. But in the end, I liked the contrast of the metal. I added a strip of ribbon around the top to spruce it up and stuffed in tissue paper for some frill.
9. Show it off! If I do say so myself, we had Pinterest-worthy cake and dessert table set up. It looked FABULOUS!!
We had a great day celebrating Abbi! Next on the topiary list will be a Mickey-inspired creation for my niece's first birthday party on Labor Day. I better get to work!
To go along with her ladybug theme party, I volunteered to make ribbon topiaries. This was my first experience making them so I am sharing a few hints in your topiary-making endeavors.
1. Pick out really cute ribbon. I used 4 different patterns of ribbon. I don't think I would use a slew of different patterns and colors. You want to be able to see the different ribbon, but also have it look cohesive. I cut the pieces in 3-inch strips.
2. Get your glue gun ready! I mistakenly got foam discs for the base, so I glued them together. I also glued the dowel rod into the base, as well as the head. Glue everything together first before adding the ribbon. Since I was traveling with these, my glue gun became a live saver when one topiary became a little lopsided.
3. Choose a neutral paint color for the dowel rod. The ladybug theme was red, black and white, so it was pretty easy to choose black for the rod.
4. It all starts with one. Choose your starting spot. I decided to start at the bottom and put one of each color at the base. Then I worked my way up.
5. Here comes the pinning. I made a ribbon Halloween wreath last year and I hot glued all the ribbon. This time, I used straight pins. It was much less messy and saved my fingers from being burned.
6. Be patient. This is a project that takes a little bit of time. Put in a good movie and keep working.
7. Marvel at your beautiful ribbon-filled topiary. Because it looks awesome and you created it!
8. Finish it up. I used a little metal bucket from Hobby Lobby as the base for the topiary. I have seen some with flower pots that are really cute too, but I was lazy and didn't want to spray paint one. But in the end, I liked the contrast of the metal. I added a strip of ribbon around the top to spruce it up and stuffed in tissue paper for some frill.
9. Show it off! If I do say so myself, we had Pinterest-worthy cake and dessert table set up. It looked FABULOUS!!
We had a great day celebrating Abbi! Next on the topiary list will be a Mickey-inspired creation for my niece's first birthday party on Labor Day. I better get to work!
Friday, September 20, 2013
The Blanket

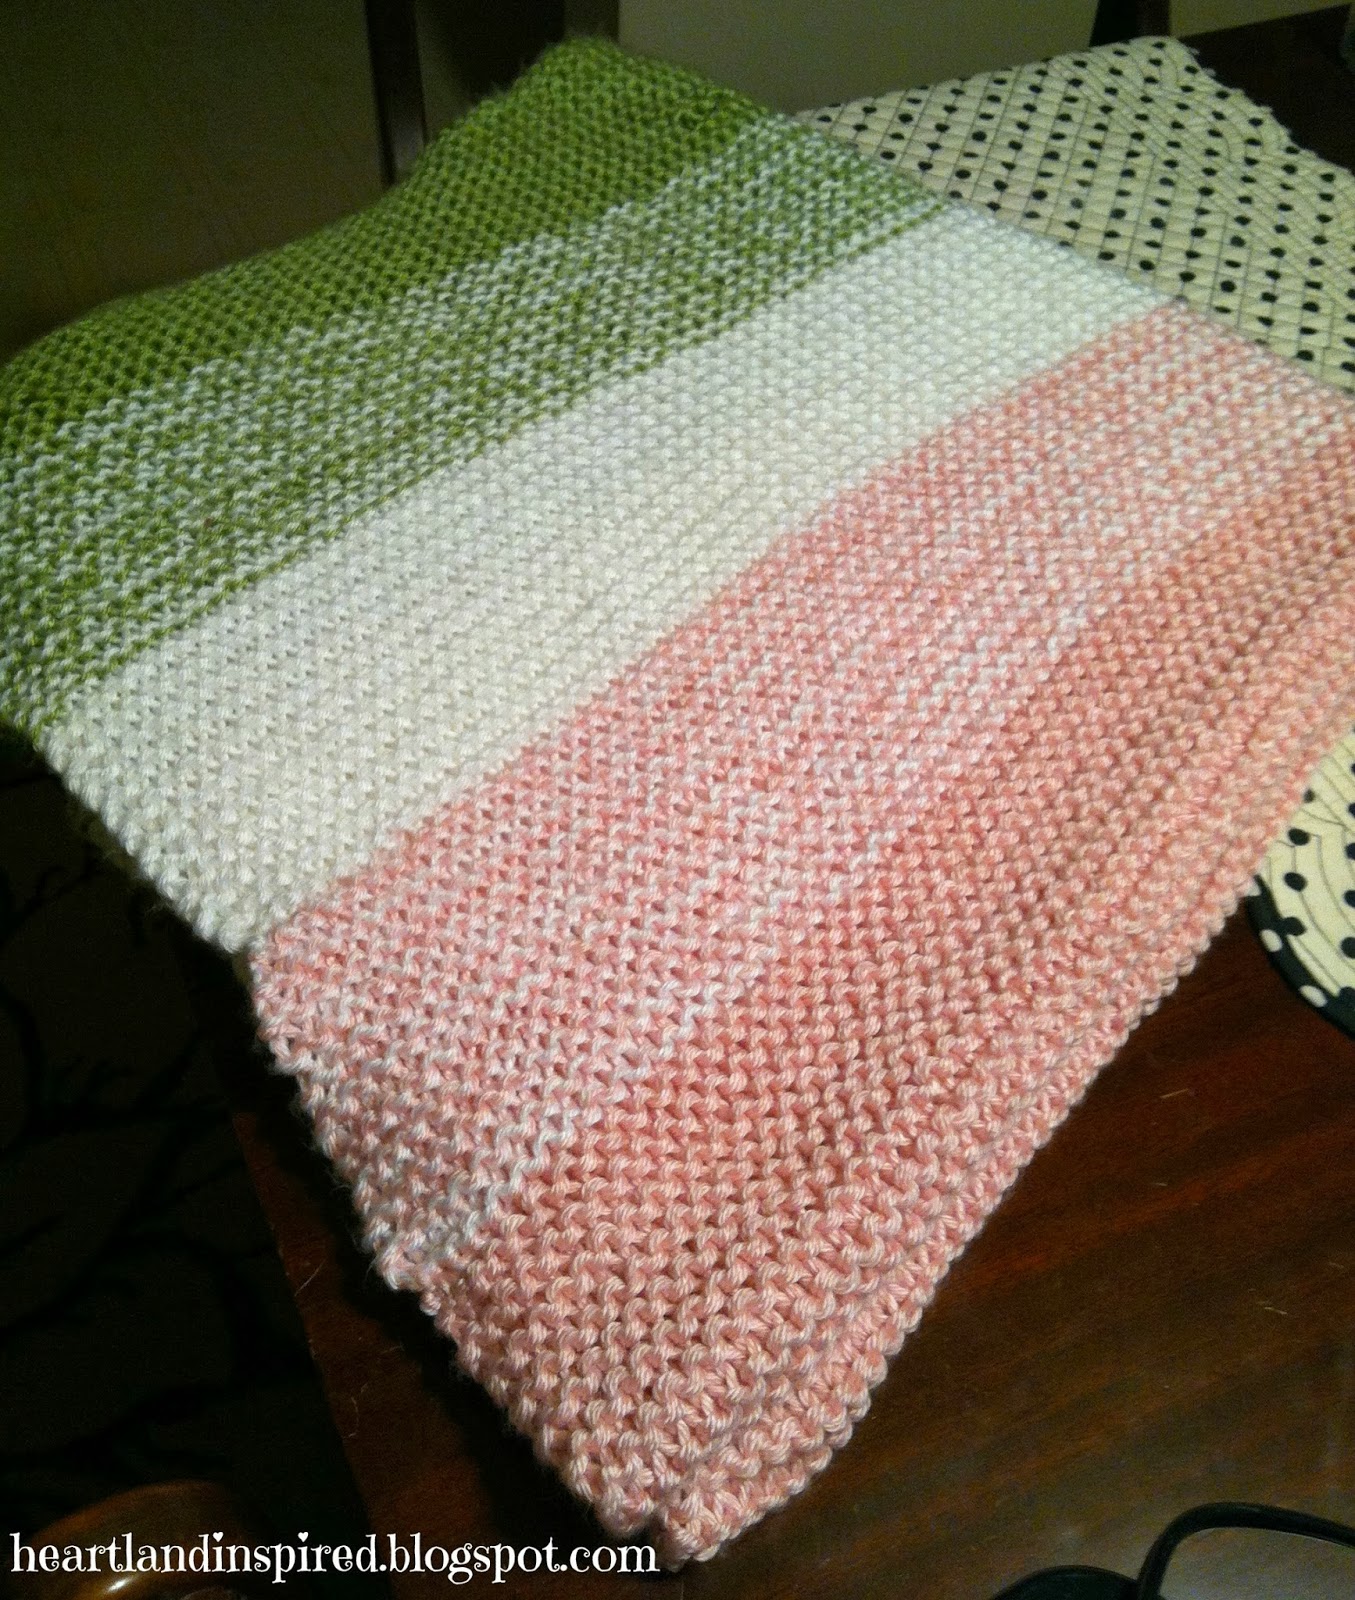
As you can imagine, when I found out I was going to be an aunt, I was beyond thrilled. As a relatively new knitter, I wanted to take on the challenge of making a baby blanket for this new little baby. I pinned several ideas, but this was by far my biggest project yet. Up to that point, I had only made dish cloths and a few scarves.
I found a pattern I liked, but wanted to modify it a little bit. The blanket was like a rainbow and a little girly if the baby was going to be a boy. So I started with green. A good baby neutral color. When we knew the baby was a girl, I chose pink as the alternate color.
Although I didn't work on the blanket consistently, it took about 6 months to finish. Toward the end, I was ready to start on something new. The blanket is much larger than I thought it would be. It is definitely bigger than a typical baby blanket. According the the instructions, the final size should be about 36x42. It would say that is about accurate.
Whether or not Brynley likes it is not really the point. She is only 4 weeks old, so I don't think she will have much of an opinion about it anyway. I wanted to make her something because I love her and this is a way I can show her that. I choose to spend my time making something that I hope will someday be special to her because her aunt made it just for her.
Next week, I will finally get to hold Brynley and give her the blanket. She lives about 10 hours away from me, and this will be my first opportunity to get up there to see her and her newly minted parents. I am so happy she is a part of our family and love her so much.
Wednesday, September 18, 2013
Too Many Projects, Too Little Time
Can I just say that my job is getting in the way of me finishing up the projects that I really want to do? This time next week, I will be on my way to Wisconsin to see my niece for the first time. I am beyond words excited! But I am trying to finish up some projects before I go. Being gone from home for 5 days is going to put a crimp in my motivation, so I am trying to finish as much as I can now.
There is really only one project that I have to finish before I go. It is a knitted baby blanket. I have been working on this blanket for months. Even before I knew if Brynley was going to be a boy or girl, this blanket was in the works. The finished product is green, white and pink. I started with green since I could go either boy or girl from there. Once I found out the baby was going to be a girl, I had to choose between pink and purple as the other main color. I am pretty girly, so my choice was easily swayed to pink. It so happens that this blanket coordinates perfectly with the colors in Brynley's room. I am the aunt....so I know all!! :)
Another project I want to finish before I head out is for my mom. She is turning my brother's old room into a Steelers theme bedroom. I am sewing two valances for her to put up. I have already started them, but need to finish them up. It won't take too much time to do, but they are still sitting on my to-do list. I wanted to finish them before my mom was here a couple of weekends ago, but they just didn't get done.
My last two projects are for me. One I could have done a very long time ago, but of course, I am waiting until the last minute. The other one is a time consuming project.
I have a small landing with a window that leads up to my apartment. My mom bought me a little table and I decorate it seasonally. Right now, my fall stuff is up. October is right around the corner and I want to change up my decorations for Halloween. I bought Halloween fabric last year, but didn't make my valance. Again, not a huge project, but another one that needs to be done.
To go with my valance, I am making a Halloween wreath. This is the time consuming project. Of course, it was another Pinterest find and I know the end result will be great. Getting to the end result is what is so hard. Since it is taking the most time, I want to spend more time on it. Which then takes away from the other things I want to finish. I will be posting about making this wreath later in October.
Instead of being able to dedicate a large amount of time on finishing all this up, I sit for 8 hours at work stressing over everything that I want to get finished. And to be the responsible adult, I should probably throw some cleaning in there somewhere. But with all the busyness, at least the time will go fast until I can hold my beautiful niece!
Subscribe to:
Posts (Atom)